This post contains affiliate links. As an Amazon Associate I earn from qualifying purchases. Learn more.
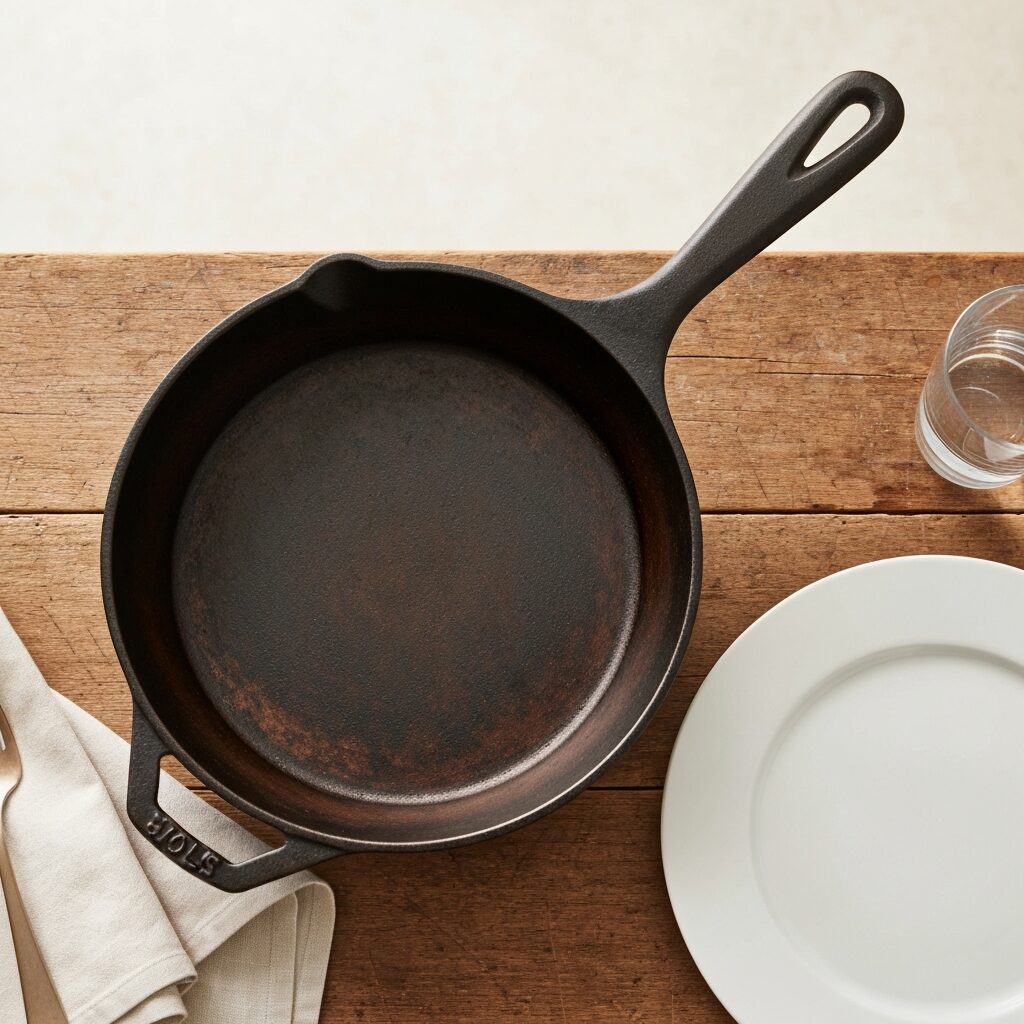
There’s something uniquely satisfying about cooking with cast iron. Maybe it’s the even heat, the satisfying sizzle, or the way it makes everything from a perfectly seared steak to a batch of cornbread taste just a little bit better. But for many, the phrase “cast iron” conjures images of endless scrubbing, sticking food, and confusion over “seasoning.” Well, friends, it’s time to demystify the magic! Seasoning your cast iron isn’t a chore; it’s an investment in a lifetime of incredible cooking experiences.
Think of seasoning as the ultimate kitchen hack for your cast iron skillet. It’s what transforms a raw piece of metal into a beautiful, naturally non-stick workhorse. No fancy chemical coatings, just pure, culinary science. Once you understand the simple steps, you’ll wonder why you ever cooked with anything else!
What Even IS Seasoning? (And Why It Matters)
In the simplest terms, seasoning is a layer of polymerized oil baked onto your cast iron. When you heat oil past its smoke point, it breaks down and bonds with the metal, creating a slick, protective, and non-stick surface. It’s not a coating that can flake off like some non-stick pans; it’s literally part of the pan’s surface. Each time you cook with oil and properly care for your pan, you’re adding to and strengthening this layer, making it more robust and non-stick over time. It’s the original “non-stick” technology, and it’s fantastic for high-heat searing, baking, and even slow-cooking.
The Initial Seasoning: First Steps with New Cast Iron
Most new cast iron comes “pre-seasoned,” which is great for getting started. However, a little extra love when you first get it home can make a world of difference. If you have an old, rusty pan that needs a full revival, the process is similar after you’ve cleaned off all the rust (which is a topic for another post!).
Prep Your Pan
Even if it’s pre-seasoned, give your new pan a quick wash with warm water and a tiny bit of mild soap (yes, you can use soap on cast iron, but sparingly!). Scrub it with a brush or sponge to remove any manufacturing residues. Rinse thoroughly and dry immediately and completely. Water is the enemy of cast iron, so don’t let it air dry!
Apply a Thin Layer of Oil
This is where the magic starts. Choose a high smoke point oil like grapeseed oil, flaxseed oil (though some find this brittle), vegetable oil, or canola oil. Avoid olive oil as its smoke point is too low. Pour a very small amount (think a quarter-sized puddle for a 10-inch skillet) onto a paper towel. Rub it all over the entire pan – inside, outside, handle, bottom – until the pan looks slightly shiny but not visibly oily. You want it to look like it’s been polished, not greased. This “thin layer” is the most crucial part.
Bake It On!
Preheat your oven to 450-500°F (230-260°C). Place the oiled pan upside down on the middle rack. This prevents oil from pooling. Place a sheet of aluminum foil on the rack below to catch any drips. Bake for one hour. The heat polymerizes the oil, bonding it to the metal.
Repeat for Best Results
Turn off the oven and let the pan cool completely inside the oven. Once cool enough to handle, you can repeat the oiling and baking process 2-3 more times. Each layer builds upon the last, creating a more robust and truly non-stick surface. This initial seasoning is the foundation for a lifetime of happy cooking!
Maintaining the Magic: Everyday Seasoning Tips
Once your pan is initially seasoned, the best way to maintain and improve it is simply to use it!
Cook with Oil
Every time you cook, especially when frying or searing, you’re essentially adding another micro-layer of seasoning. Just make sure to use a decent amount of cooking oil or fat. Your pan loves fat!
Clean Gently
After cooking, let the pan cool slightly. Scrape out any food bits. For stuck-on food, a stiff brush or a (paid link) works wonders. You can use a tiny bit of mild dish soap and warm water if needed – the old myth about soap ruining seasoning is mostly outdated with modern soaps and robust seasoning. Just don’t let it soak.
Dry Thoroughly
This cannot be stressed enough! After washing, immediately dry your pan with a clean towel. For extra measure, you can place it on a burner over low heat for a few minutes until all moisture has evaporated. This prevents rust.
Light Re-Oil
Once dry and slightly warm, apply another very thin layer of your chosen seasoning oil with a paper towel. Wipe off any excess until the pan looks almost dry again. Store it in a dry place. This little step after each wash keeps your seasoning strong and happy.
Common Seasoning Mistakes to Avoid
Too Much Oil
This is the #1 culprit for sticky, gummy seasoning. Less is definitely more. You’re aiming for a microscopic film, not a greasy sheen.
Not Drying Completely
Rust is the arch-nemesis of cast iron. Any lingering moisture will invite rust, which means you’ll have to scrub it off and re-season that spot.
Harsh Soaps or Steel Wool
While a little mild soap is fine, don’t go at your pan with industrial-strength detergents or abrasive steel wool unless you’re intentionally stripping it down for a full re-seasoning. These will strip away your hard-earned seasoning.
Skipping Maintenance
Cast iron is an investment that loves a little attention. A quick dry and re-oil after each use takes seconds and will save you headaches down the road.
When Your Seasoning Needs a Revival: The Emergency Room for Your Pan
Don’t panic if your pan starts looking dull, has sticky spots, or shows a bit of rust. It’s not ruined! For sticky spots, scrub with salt and a little oil or warm water, then rinse, dry, and re-oil. For rust, scrub aggressively with steel wool or a stiff brush until the rust is gone, then wash, dry thoroughly, and repeat the full initial seasoning process. Your pan is incredibly resilient!
Essential Tools for Cast Iron Care
While you don’t need much, a few simple tools can make cast iron care even easier:
Cast Iron Scraper: These plastic or polycarbonate scrapers are fantastic for easily removing stuck-on food without damaging your seasoning. (paid link)
Stiff Bristle Brush: Great for general cleaning without being too abrasive.
High Smoke Point Oil: Keep a bottle of grapeseed, canola, or vegetable oil handy specifically for seasoning.
You can also find specialized cast iron seasoning oils (paid link) that often have a blend of oils and waxes designed for optimal polymerization, though your regular cooking oil will do the job perfectly well.
Embrace the Cast Iron Journey!
Learning to properly season and care for your cast iron is one of those kitchen skills that truly pays off. You’ll not only have a pan that cooks beautifully and effortlessly, but you’ll also be investing in a piece of kitchen history that can be passed down for generations. So go ahead, embrace that sizzling skillet, make some incredible meals, and watch your seasoning deepen and improve with every delicious creation. Happy cooking!
That’s right, it’s back again for another crazy year. It’s World Vegan Day. I know many of you, my readers, are not vegans, which is just fine. Neither am I. However, there is nothing wrong with trying vegan recipes every now and then (like my soyrizo taquitos for instance…) I was vegan once for about…
I went to a class on classic cooking techniques tonight where we made a couple of different dishes including a sauted veggie medley that was fantastic. As I am shoveling zucchini into my mouth, I feel like I’m eating resturant quality food that I cooked. I kept thinking “These vegetables taste so much better? What is…
Elevate your classic potato salad with a vibrant medley of fresh spring herbs and a zesty, lighter dressing, perfect for Easter, potlucks, or your next backyard BBQ.
This grilled chicken recipe features a vibrant, herb-packed Green Goddess marinade that doubles as a bright finishing sauce, perfect for spring cookouts and weeknight dinners.
Unlock culinary freedom by mastering ingredient substitutions. Learn how to swap dairy, adapt for low-carb diets, and customize recipes based on flavor, function, and what you have on hand.
The other day, my friend Carissa emailed to ask a question. It seemed that she was going to serve 30 guests that evening and wanted some thoughts on making this recipe from RecipeZaar for Fresh Orange Rice and wanted my thoughts on how to make it. First off, Carissa is a great cook, so I…